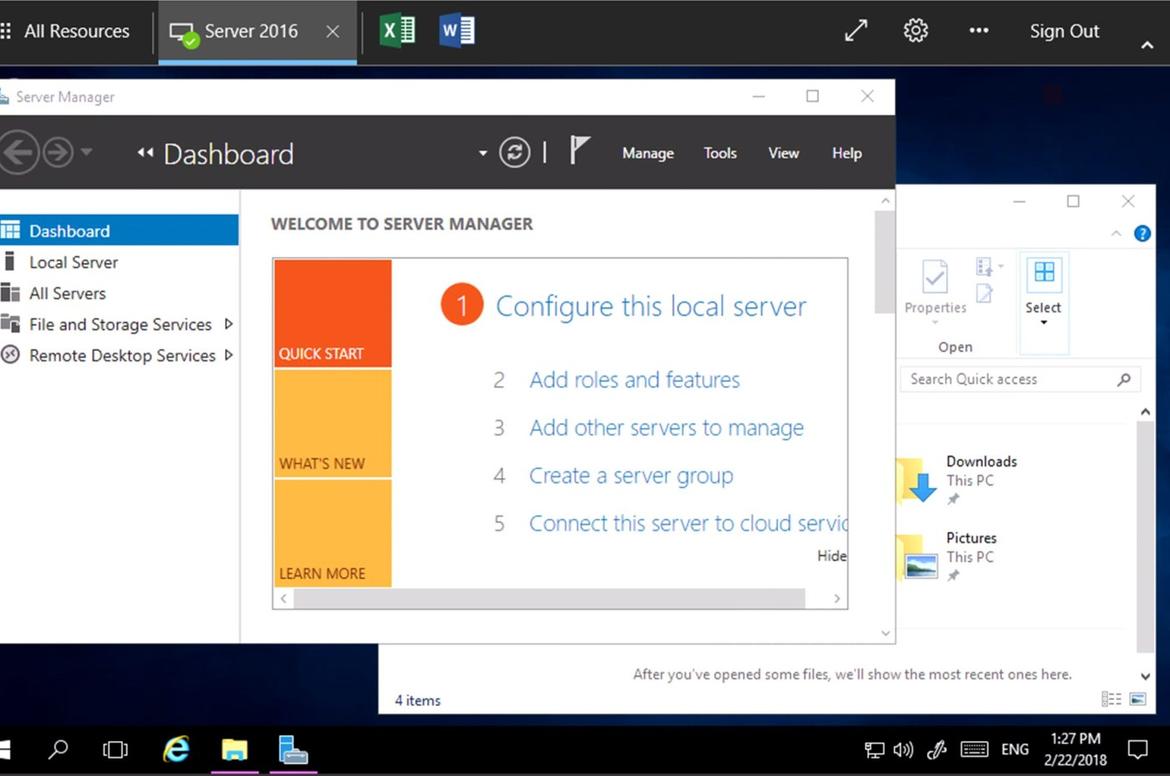
Remote Desktop Web Client Available
Microsoft recently announced the general availability of the Remote Desktop web client for Windows Server 2016 and Windows Server 2019 Preview.
With a few simple PowerShell cmdlets, the client can be added to an existing Remote Desktop Services (RDS) deployment, side by side with the RDWeb role. Here are the currently available features, as well as how to install.
Available Features
- Access desktops and apps published through a feed
- Single sign-on
- Print to PDF file
- Audio out
- Full screen and dynamic resolution
- Copy/paste text using Ctrl+C and Ctrl+V
- Copy/paste text using Ctrl+C and Ctrl+V
- Localized in 18 languages

Installation
What You Will Need:
- Make sure your Remote Desktop deployment has an RD Gateway, an RD Connection Broker, and RD Web Access running on Windows Server 2016 or 2019.
- Make sure your deployment is configured for per-user client access licenses (CALs) instead of per-device, otherwise all licenses will be consumed.
- Install the Windows 10 KB4025334 update on the RD Gateway. Later cumulative updates may already contain this KB.
- Make sure public trusted certificates are configured for the RD Gateway and RD Web Access roles.
-
Make sure that any computers your users will connect to are running one of the following OS versions:
- Windows 10
- Windows Server 2008 R2 or later
How to Publish:
- On the RD Connection Broker server, obtain the certificate used for Remote Desktop connections and export it as a .cer file. Copy the .cer file from the RD Connection Broker to the server running the RD Web role.
- On the RD Web Access server, open an elevated PowerShell prompt.
- On Windows Server 2016, update the PowerShellGet module since the inbox version doesn’t support installing the web client management module. To update PowerShellGet, run the following command:
Install-Module -Name PowerShellGet -Force
- Install the Remote Desktop web client management PowerShell module from the PowerShell gallery with this cmdlet:
Install-Module -Name RDWebClientManagement
- After that, run the following cmdlet to download the latest version of the Remote Desktop web client:
Install-RDWebClientPackage
- Next, run this cmdlet with the bracketed value replaced with the path of the .cer file that you copied from the RD Broker:
Import-RDWebClientBrokerCert (.cer file path)
- Finally, run this cmdlet to publish the Remote Desktop web client:
Publish-RDWebClientPackage -Type Production –Latest
Make sure you can access the web client at the web client URL with your server name, formatted as https://server_FQDN/RDWeb/webclient/index.html. It’s important to use the server name that matches the RD Web Access public certificate in the URL (typically the server FQDN).
NOTE: When running the Publish-RDWebClientPackage cmdlet, you may see a warning that says per-device CALs are not supported, even if your deployment is configured for per-user CALs. If your deployment uses per-user CALs, you can ignore this warning. We display it to make sure you’re aware of the configuration limitation.
When you’re ready for users to access the web client, just send them the web client URL you created.
Trusted Tech Team is an accredited Microsoft CSP Direct Bill Partner, carrying multiple Solutions Partner designations and the now-legacy Microsoft Gold Partner competency. Based in Irvine, California, we report trends affecting IT pros everywhere.
If your organization uses Microsoft 365 or Azure, you may be eligible to receive a complimentary savings report from a Trusted Tech Team Licensing Engineer. Click here to schedule a consultation with our team now to learn how much you can save today.
Subscribe to the Trusted Tech Team Blog
Get the latest posts delivered right to your inbox

